Rat Lab Security Role Guide
Lock the lab down — nets, batons, and timed chases beat highlight hunting.
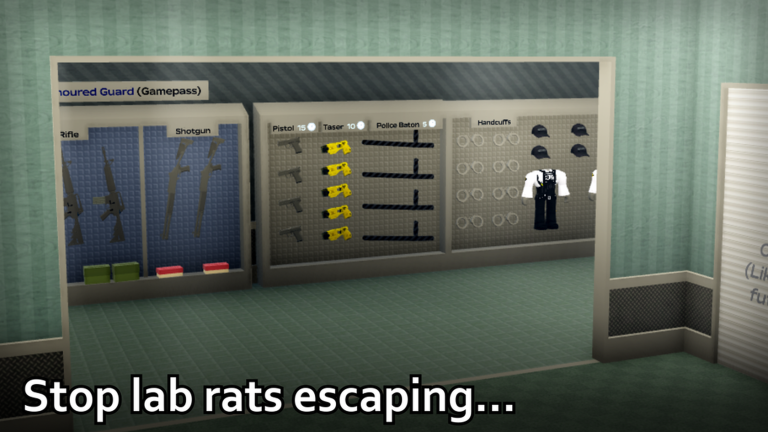
Security is the lockdown role in Rat Lab. You exist to interrupt Lab Rat escapes, stabilize corridors for Scientists, and turn messy breaches into controlled captures. This page covers your core kit — net, baton, taser, guns, sniper, plus traps and armour habits — and how to think in stages instead of tunnel-vision chases. Read alongside the Security Guide, Tools & Unlocks, and the Teams Hub.
Win condition
A good Security round is measured in prevented stage transitions and clean captures, not only raw eliminations. If Lab Rats complete the three-stage escape while you farm mid-map bites, you lost the assignment even if your damage meter looks loud.
Primary jobs:
- Contest stage-one exits early.
- Hold mid-lab chokes where nets and traps excel.
- Anchor the final exit when rats commit to stage three.
- Avoid griefing Scientists who still need living subjects for Mutation Index work.
Session tool unlocks reset each join
Security toys feel powerful — and they still reset every time you join. Do not invent a mental loadout from last night’s sniper unlock. Each session:
- Confirm role and spawn wing.
- Grab early control tools (net / baton / taser as available).
- Unlock guns and sniper only as the session allows.
- Place or respect traps on high-traffic escape lines.
- Reassess after deaths; unlock progress may partially reset with your life rules depending on patch — always verify live.
Details and unlock cadence notes belong in Tools & Unlocks. Relative power rankings sit on the tools tier list.
Tool breakdown (Security lens)
Net
Best friend for rat momentum. Nets punish linear sprints and vent pops. Lead the target; do not throw where the rat already was. After a net hit, follow with baton or taser — nets alone are not a full win button against vested rats (vest = +50 HP).
Baton
Close-range discipline tool. Great in doorways and after a successful net. Poor if you chase into unknown lab rooms without backup.
Taser
Stops peels and buys cuff / capture windows. Save it for rats that still have bite available; wasting taser on a already-slowed target is a classic throw.
Guns
Mid-range answer when rats refuse to enter net range. Watch friendly fire near Scientists. Guns shine in long halls; they lose value in tight vent mazes.
Sniper
Late-session specialty for locking stage-three approaches and overlooks. Positioning > twitch aim. If you miss the first shot, rats learn your angle — relocate.
Traps
Force pathing. Place on alternate routes so a single bait hallway is not enough. Coordinate so Scientists are not soft-locked out of their own wing.
Armour / hazmat awareness
Armour helps you win baton trades. Hazmat matters more when mutation fallout is active — know when science wings are unsafe even for Security. See Mutations for colour literacy (and remember colours are not promo codes).
Stage-based patrol plan
Stage 1 pressure
Flood likely rat exits. One guard greedily hunting deep while two exits stay open is how early escapes happen. Call spawns.
Stage 2 mid-lab
Rotate between trap lines and scientist protection. This is where Lab Rats try to invent creative paths. Deny information: if a rat sees your whole kit early, they will juke differently in stage three.
Stage 3 final door
Play the objective, not the kill feed. Nets and tasers at the commit point beat sniper ego from the wrong balcony. If a rat has vest HP remaining, assume they can survive one mistake — yours or theirs.
Escape structure reference: How to Escape (know the enemy route to hard-counter it).
Working with Scientists
Scientists are not free kills and not always perfect allies. Quick rules:
- Do not steal a tagged subject mid-Index unless the breach demands it.
- Share callouts on rat colours / statuses without confusing them for codes.
- Keep crossfire lanes clean when mutation guns are out.
Scientist deep-dive: Scientists and Scientist Guide.
Common Security mistakes
- Tunnel chasing one rat while the pack finishes stage two elsewhere.
- Ignoring vest math and wondering why baton trades feel unfair.
- Assuming sniper unlocked permanently after one good session.
- Blocking scientist doors “for safety” and creating softlocks.
- Trusting unverified exploit scripts for ESP or timer skips — read Scripts and stay official.
Ranking context
On the Roles tier list, Security often grades high for PvP / lockdown goals and solid for coordinated play, while pure “fun chaos” may favour Lab Rats. Adjust expectations to your group’s vibe.
Beginner Security checklist
- Learn two chokes per stage before learning fancy flicks.
- Practice net → baton / taser confirms.
- Take armour when contested; respect vest +50 HP on rats.
- Re-clear tool unlocks every join without complaining — it is the ruleset.
- After mid-September Forever / Mutation Codes pass updates, recheck Updates for balance notes.
- Use Getting Started if you are brand new to the place.
Related pages
Play Security when you like reading the map one step ahead of the escape. Capture the route, not just the highlight.
Frequently Asked Questions
Quick answers for Rat Lab players.
What tools define Security?
Net, baton, and taser for capture windows; guns and sniper for range; traps and armour for control. Exact unlock order is session-based.
How do I stop the three-stage escape?
Contest stage-one exits, trap mid-lab alternates, and anchor the final commit point. Knowing the escape guide routes makes counters obvious.
Why do Lab Rats feel tanky?
The vest grants +50 HP. Factor that buffer into baton and gun trades instead of assuming one clean hit ends the chase.
Should Security fight Scientists?
Almost never as a default. Coordinate containment. Conflict usually helps Lab Rats slip through.